Showing posts with label DIY. Show all posts

Monday, April 22, 2013

Clean Living // Orange Vinegar "Green" Cleaner


Happy Earth Day! Today could not be a more beautiful day to enjoy the natural world around us. It's almost 60 degrees here in Chicago (and sunny too!) which is more than we have been able to enjoy lately. In honor of today's "holiday" I wanted to bring you a very simple way to reduce the amount of chemicals that you use in your house or apartment. 

Luis and I recently started reducing the amount of processed foods, chemicals, and toxins that we put in our bodies, and that led me to consider the ways to reduce all of those things in our home as well. I started a new Pinterest board dedicated to what I see as "clean living." A lot of the cleaners we use every day are full of harsh chemicals that are purposed to wiping our bacteria, even the good stuff. Some of these tend to lead to skin irritations and are almost always fatal if ingested.


But don't get too stressed out. You don't necessarily have to cut out everything- look for household cleaners that are less caustic and friendlier to both the environment and the body. Look for "green" and "nontoxic" cleaners, or products that say, "petroleum-free," "biodegradable," "phosphate-free," "VOC-free," or "solvent-free." These are likely to be less harmful to have around; or, most "green" cleaners can be made with every day household items like baking soda, vinegar, and even lemons. This super simple DIY cleaner uses only vinegar and lemon peels as its ingredients and is sure to disinfect and pleasantly deodorize.

Orange Vinegar Cleaner
1 Mason jar of any size (just make sure it has a seal-able lid)
Peels from about 2 orange (possible more depending on size of jar)
Vinegar to cover peels

Clean out the Mason jar. Place peels inside jar all the way to the top of the jar, pushing down to make sure that you can fit as much in as possible. Pour enough vinegar into the jar to cover the peels. Replace the lid and store for two weeks so that the vinegar can absorb the orange essence. After two weeks, it will be ready to use.


Monday, April 1, 2013

DIY: Rose Petal Bath Salts


If you'll allow me to gush for just a moment, I'm so incredibly thankful that my apartment has a bathtub! For as long as I can remember, taking the time to soak in a hot bath has been one of my favorite ways to unwind.


As an obvious result, I go crazy for bath-related beauty products: scrubs, bubble bath, and bath salts, especially if they are of the DIY nature. Recently, I've become inspired by healthy living choices. I have never been someone who really paid a large amount of attention to my diet or to the products and substances I was putting on my body. But lately I've been finding prevalent evidence that has persuaded me to give things a closer look, so I have found myself gravitating towards clean living and beauty products that are low in toxins and chemicals. These DIY bath salts are a great place to start.


Rose Petal Bath Salts
1 cup Epsom salt
1/2 cups sea salt
1/3 cup of baking soda
1 tablespoon of rose essential oil (or rose water)
Handful of crushed rose petals

Mix Epsom salt, sea salt and baking soda in a jar; you can just seal the lid and shake to combine. Reopen and add the essential oil and petals; shake to combine. Store in a dry place.

Super easy and chemical free!


Thursday, March 7, 2013

Gilded Cat Canvas Painting


I've been wanting to post this DIY for a while, but I kept dragging my feet with it for some reason. Either way, I finally got the photos edited and compiled and it's all ready to go. 
I got this inspiration from a cat print from Leah Reena Goren right after Luis and I moved into our new apartment. We had more wall space than in our previous apartment, so I wanted to create something that I felt was different. I loved the cat print so much that I decided to recreate it on my own!


 DIY Materials:
Acrylic metallic gold paint (I used FolkArt Metallic paint) 
Acrylic black paint (not shown in the photo)
2 flat brushes, one about an inch, and the other a quarter of an inch
1 foam paint brush
Canvas

Directions:
Cover the entire canvas with a layer of black paint with the foam paint brush. Be sure to paint each side of the canvas as well. Once the first layer is completely dry, repeat the paint step twice. You will have a total of three layers of paint on your canvas. 

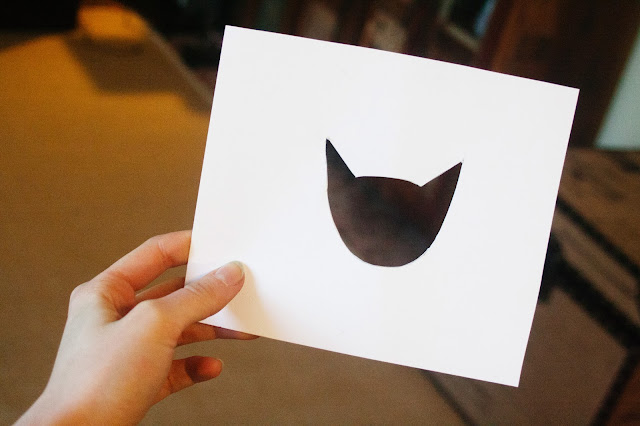
While you're waiting for the layers to dry, cut out a stencil of whatever shape or text you would like to paint on your canvas. 


 Lay the stencil on the canvas and paint over it with the gold paint. You may have to repeat this a few times until the paint is opaque in color.


After that, your canvas is complete. Some of the gold paint leaked outside of my stencil so I had to go over some of the stenciled areas with black paint where needed. I made two of these canvas paintings, one of them found a spot in our living room and the other is in our bedroom.


Wednesday, December 12, 2012

DIY: Digital Silhouettes in Photoshop Elements


I've been wanting to make these for quite a while now, and I was so glad when I figured my way around how to do it! Ever since Luis and I moved, I've been dreaming up some ways to style/decorate the full wall in our bedroom and I knew I wanted a silhouette of us somewhere on that wall. 

Let's go!

What You'll Need:
PSE (or PS)
A profile shot of your subject; not a straight-on photo but one from the side
Creativity!

Step 1:


Open the photo in Photoshop.

Step 2:


Duplicate the layer by going to Layer > Duplicate Layer > OK

Step 3:


With the Background Copy selected, go to the drop-down menu where it says "Normal" and select vivid light. This will concentrate your photo's color so that you can easily crop the photo in the next step. 

Step 4:


Flatten your image. Go to Layer > Flatten Image or right click and select "Flatten Image".

Step 5:


Using the Magnetic Lasso tool, carefully outline your photo.

Step 6:


Once your subject is selected (there will be "marching ants" as seen in the above photo) delete the selection. 

Step 7


Use the paint bucket tool to fill in the deleted portion with black, or your desired color. 

Step 8:


Go to "Select" at the top of the program and select "Inverse" and delete the selected portion on the photo.

Step 9:


This is what your photo will look similar to once you delete part of the image. If you are not satisfied here, simply use the eraser and/or paint brush tool to erase or fill in the space to create a more cohesive silhouette. 

Step 10:


This is what my photo looked like when I finished adding and erasing. I also made a silhouette for my husband Luis. Save as a jpeg to use for future projects and such! 


Friday, November 16, 2012

Easy At-Home Manicure Tips


 It's Friday. I have a major case of writer's block today. But I'm here. 
Today's my day off and I cannot tell you how good it feels. It's the time of year that becomes simultaneously joyful and stressful. There must be some secret oath that professors take, promising to always give the optimal amount of work, research, and reading to their students during that week. I can only hope and pray that this will all be worth it. Yet all the stress seems bandaged over by the Christmas music on the radio, businesses and homes setting up Christmas lights, and plans for the new year. That's where I'm trying to keep my sights focused.

 In the general spirit of trying to liven things up, I gave myself a manicure today and I wanted to share some of my favorite tips with you- because everyone deserves a day off.

I am utterly aware that oxblood and burgundy are the go-to colors for everything this season. Seriously, oxblood lipstick? Anyway, I chose a different shade and befriended a lovely hot pink. Victoria's Secret just released two lines of nail polish and I'm pretty excited about it. I have quite a few already, and the color I chose is their Signature Pink Nail Lacquer. 


1. Start with a clean slate. 
If you have any old, chipped polish on your nail, give those babies a once over! Remove any traces of polish on your nails. I prefer non-acetone remover because it's not as harsh and I have slightly brittle nails. 

2. File and trim.   
Don't use your nail file to get rid of length- it will make your nails break and split over time. Always use nail clippers to trim nails to your desired length and use a file to shape the edges or chipped sides. Since the base of my cuticles are an oval shape, I keep the tips of my nails oval shaped as well.

3. Optional Primping.
This step is purely optional and depends on your lifestyle and how much time you have. But if you want to get the full-on experience at home, pay attention. Soak your hands in warm water for about 5 minutes. I like to add a little baby oil to the water to really soften my cuticles. Afterwards, push back your cuticles if they need fixing. Mine usually don't get too out of control, but it's good to do every so often. 

4. Optional Primping Part Two.
Again, totally optional- scrub and moisturize your hands. Mary Kay sells an amazing three step set called Satin Hands Pampering Set. I was given one for Christmas and use it only on special occasions. Be sure to remove excess lotion from your hands because polish won't adhere to your nail as well if it's covered in moisturizer.

5. Never Skip a Base Coat.
My best friend once asked me what kind of base coat I use and I replied: "I don't really use one." She looked as though I had punched a baby (ok I'm exaggerating here...). Either way, her reaction caused me to try painting my nails using a base coat first. The color was much more concentrated and stayed put with less chipping and fading. I always thought base coats were a waste of money, but they can actually extend the life of your nail polish because you will be using less at a time. 

6. Apply One-Two Coats of Chosen Polish.
Obviously this step is self-explanatory, but hey, let's not leave anything out. Some of my favorite brands are Essie, O.P.I., NYC New York Color, Sally Hansen Hard as Nails Xtreme wear, and ULTA's nail polish. 

7. Let the Polish Dry.
Some polishes dry faster than others. Take your time with it; read a book or a magazine, or watch a show while you wait (that's part of the fun). If you need to speed up the process, dip your nails in a bowl of ice cold water for 30 seconds. It "freezes" the polish and hardens it so you can get on with your day. 


Have an amazing Friday!

Wednesday, November 14, 2012

DIY Canvas Wall Art


I've been wanting to post another DIY project for quite some time. The problem is that I just haven't had much time to do anything in the past few months. School has thrown me one curve ball after another and life in general has been pushing me around. I'm not complaining: it happens! 


As I've mentioned, Luis and I moved into a new apartment. I've enjoyed the move because it forced me to reckon with everything I own. Do I need this? Do I want this? Do I even use this? We had quite a bit of stuff to haul over to the Salvation Army and I'm still trying to find new homes for various unwanted items. 

It's also inspired me to create a new atmosphere in our place. I was browsing one of my favorite blogs, enJOY it by Elise Blaha Cripe, when I found a project she whipped up. I realized that I already had all the materials and dove in! It's a really inexpensive and easy DIY project. I think I must have spent $10 at the most on all of the items (and that's a very liberal estimate). Read on for the how-to!


Materials Needed:
1 canvas (any size is fine, it all depends on how big you want the print to be)
2 paint brushes, one with a fine tip, the other a little thicker
1 2 fl. oz. bottle of acrylic paint (I used back paint, you can choose any color)
A plate or somewhere to put the paint you'll be using

I chose a set of lyrics by The Weepies from their song "Simple Life." I just began to paint the lyrics onto the canvas with the larger of the two brushes. Use your wrist to create a fluid motion while you paint- it will make your words flow easier. 


I tried to make the words dark and perfect the first time, but I found that it began to make my words look forced. So I just continued to paint with one or two dabs per word. I let it dry for about an hour and the went over the words with the smaller brush to fill in the spots that needed more color concentration. 


I ended up making two prints to hang on both sides of the wall where we have our t.v. cabinet. I am really loving the way it frames our t.v. and makes the wall look uniform and unique.

 
I still have a ton of ideas and projects that I want to incorporate into our apartment. This is just the beginning!


Saturday, June 9, 2012

UP! Inspired Bridal Shower

A few weeks ago, my friend Alyssa and I threw a bridal shower for our best friend, Kelsey. We had no trouble coming up with a theme to inspire our decoration since one of Kelsey's favorite movies is Pixar's Up! So, taking our cue from the colorful world of Pixar, we rolled up our sleeves and shopped, baked, and decorated with the goal of creating a simple, yet whimsical shower.


Wednesday, March 21, 2012

DIY Floral Ephemera Collage


Oh, the ampersand; this emblematic symbol's main purpose is to unite, to bring two things together. "You & Me," "Liberty & Justice," "Bread & Butter." Not only does it act as the logo for a conjunction, it's also able to stand alone as a beautiful symbol; without it, an idea is incomplete. That being said, I was making my daily rounds on Pinterest the other day when I saw a photo of someone who printed an ampersand in floral ephemera (basically just meaning floral cut-outs from magazines, books, etc). I love its symmetry and simplicity and I had to recreate it on my own. I always save magazines, so I pulled some out and started cutting away!

Friday, March 2, 2012

DIY Project: Pinterest Terrarium

My best friends finally convinced me to make a Pinterest (I'm hooked...) and I kept seeing these gorgeous terrariums. Essentially, terrariums are small arrangements of succulent plants, cacti, or moss in glass jars, cups, or whatever you choose to put them in. Since I live in an apartment, I'm always keeping my eyes open for little ways to make it more lively and interesting. I thought this would be the perfect way to incorporate nature and my new-found interest in gardening.


Check out some more terrarium goodness here!

I read the above article one morning and couldn't shake my desire to make one! They looked so easy!

So, for those of you who, like me, have been sucked into the do-it-yourself arena, read on to learn how to easily make one of these gorgeous terrariums. Your ingredients will include: a glass jar, pebbles or small rocks, cactus potting soil, and your chosen plant! Make sure the plant that you choose will thrive in the level of light your house or apartment can give the plant. If you don't have a southern facing window, perhaps choose one that operates in medium to low level light. Just read the instructions that often come with the plant.


BlogCatalog BlogCatalog